

It would be safe to safe to assume you own a racket stringing machine and want to learn how to string your own tennis rackets. In this piece we present to you a step by step guide on how to use a tennis racket stringing machine that should get you started.
If you have broken the strings of your racket or if you feel the strings have gone dead and don’t have the same power or control, then it’s time to get the racket restrung.
For players who constantly break their strings, particularly the power hitters, they need to get their rackets restrung quite often. And if you are getting it done by a stringer it can become a costly affair.
Which is one of the reasons why many players and coaches prefer to get their own racket stringing machine and do the deed themselves instead of replying on professional stringers.
A tennis racket must be strung correctly and a racket stringing machine can help you get that accuracy. For starters, it may seem to be a complicated task, but if you follow the instructions properly, stringing rackets can become an easy job.
Before we delve deeper into the subject of how to string your racket using a racket-stringing machine we must first know that there are basically two types of tennis racket stringing machines: manual and electronic.
The manual machines are powered by hand and therefore they are less expensive, but also less accurate. The electronic machines are more accurate but they cost more.
Also, the manual machines could be further categorized on the basis of the way in which tension is applied on the strings. They are either drop weight machines or manual crank machines. While the former use a hanging weight to apply tension to the strings, the latter uses a hand-cranked system to apply tension to the strings.
So now we know why a racket stringing machine is an important piece of equipment and what are its various types available in the market. Here we present a step-by-step guide on how to use a racket stringing machine.
Also Read:
Table of Content
Familiarize Yourself with the Machine
Before starting the stringing/restringing process, take a look at the machine and familiarize yourself with the various parts of the machine. Also make sure you have all the tools that will be necessary for the entire process of stringing.
These include tennis strings, scissors or a string cutter, pliers and awl.
Select the Right String and Tension
It’s important to choose the right string as it has a direct impact on one’s game.
String tension is the key to one’s performance. It is how tight the strings are attached to the racket frame and it has to be accurate and precise to suit a player’s playing style. String tension is usually in the range of 40-65 lbs.
A low string tension gives more power, spin and comfort, while a high string tension gives a player more control.
Strings are made of different materials, such as natural gut, synthetic gut, polyester and multifilament. Natural gut strings are made from cow intestine. They offer more power, comfort and feel, but are much more expensive than the synthetic strings.
Synthetic gut strings are not too durable but they are affordable, however they are more suited for casual players. Polyester strings are more durable and provide good control, but they can be stiff and can be harsh on the arm. Multifilament strings lie between the synthetic and the natural gut strings.
They are more durable than synthetic strings and affordable in comparison to natural gut strings.
Apart from tension and material, another factor to watch out for when selecting a string is the gauge or thickness of the string. Thicker strings are more durable but less responsive, while thinner strings provide more feel and control but may break more easily.
Strings must also be selected based on a player’s style of play. Players who hit with a lot of spin may prefer strings that offer more grip on the ball, such as polyester strings. Players who rely on power may prefer strings that are more elastic, such as natural gut or multifilament strings.
Here is Roger Federer answering questions about tension and rackets:
Also Read:
Prepare the Racket
Before beginning the stringing process, you need to prepare the racket properly. First, remove any existing strings from the racket using a string cutter. This will make sure that the new strings are securely fastened to the racket’s frame.
Next, inspect the racket’s grommets, they should not be damaged or worn.
Grommets are the small plastic tubes that the strings pass through (read our exhaustive guide on them here). If the grommets are damaged, they can break the strings prematurely. If you notice any damage, replace the grommets before stringing the racket.
Lastly, wipe off any dirt or debris that may have accumulated on the racket. This will help ensure that the strings adhere properly to the racket’s surface.
Mount the Racket on the Machine
The next step is to mount the racket on the machine.
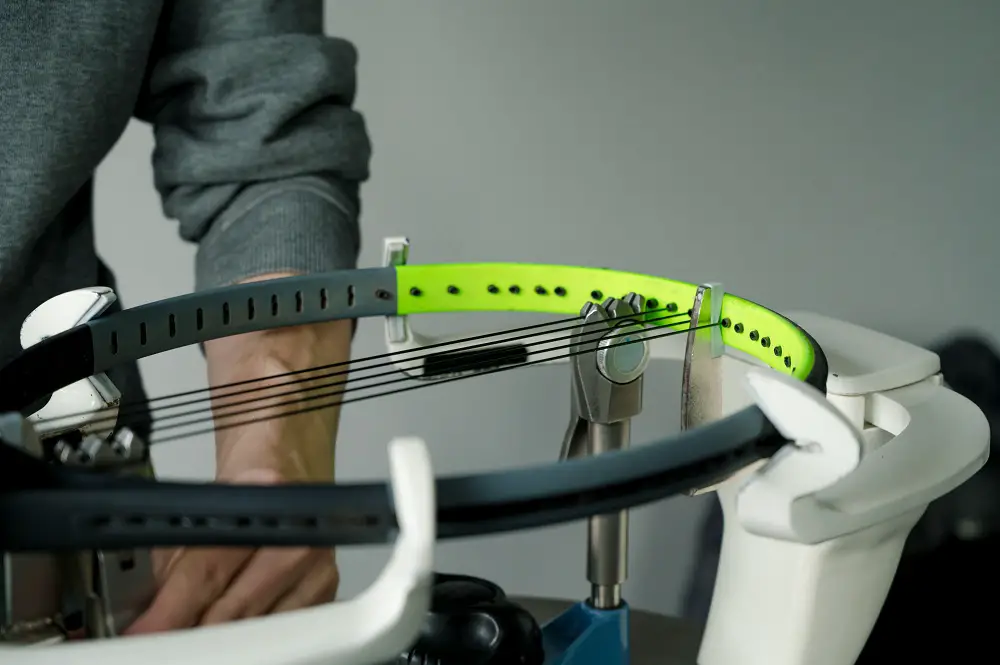
First place the machine on a stable surface, such as a table. Then insert the racket into the machine’s clamps, fitting the head and the neck of the racket in the designated places. Make sure that the frame is stable and held firmly. Adjust the clamps to hold the frame in place while you work.
Then match the tension head’s height to your racket’s size and shape. The tension head should be at the same level as the center of the racket’s head. If the tension head is too low, it will not apply the proper tension to the strings.
Insert the Strings
Before beginning the stringing process one must decide if they would use a single piece of string for both the mains and crosses or two separate pieces.
A one-piece string means using the same string for both the mains and the crosses, while a two-piece string means using separate strings for the mains and the crosses.
Let’s take an example of two-piece method and start by stringing the mains, which are the vertical strings that run from the top of the racket to the bottom.
Before inserting the string let’s measure the size of the string that is needed. Start from the bottom and take it to the top. Now count the number of mains. Say there are 16 mains then measure the length of the string 16 times plus two more times so that you have a little extra and don’t fall short in the end.
Next cut off the string.
If a racket has six holes at the throat, start inserting from the bottom and if there are eight holes on the throat start from the top.
Insert the string from the middle two holes and pull them out of the middle two holes on the top. They both should be same in length. Then use a clamp to secure one of the strings, close to the grommet, so there is no tension loss. Next step is to add tension to the string that’s not clamped.
Secure the end of the string to the tension head using the appropriate clamp. Begin tensioning the string by turning the tension head knob. The amount of tension you apply will depend on your personal preference.
Release the string and then insert the string through the appropriate grommet hole and pull it down to the bottom of the racket.
Secure the string to the appropriate clamp on the machine.
Repeat the steps, for all the mains.
Also Read:
Here is an interesting video that shows four different ways for starting mains:
Weaving the Cross Strings: To weave the cross strings, take the first cross string and thread it through the first main string at the bottom of the racket, starting from the left side. Then, weave the string over and under the main strings until you reach the other side of the racket.
A common weaving pattern is the “two-piece pattern”, which involves weaving the cross strings in pairs, going over two main strings and under two main strings.
As you weave the cross strings, make sure to pull each string tight as it will help to maintain the tension of the racket and prevent it from feeling too loose.
Then repeat the process by continuing to weave the cross strings in pairs, alternating between the over and under pattern, until you reach the top of the racket. One must ensure that the strings are straight and not twisted or overlapping.
Once all the cross strings are in place, secure them by clamping them to the stringing machine.
Here is how to weave the crosses
Tie Off the Strings
Once all the strings are in place, one must tie off the strings to secure them in place. Start by tying off the crosses, then the mains. Cut off any excess string with a pair of scissors or a string cutter, being careful not to cut any strings that may have been accidentally missed.
Here is how you can tie off the knots:
Check the Tension
In the end, it’s essential to check the tension of the strings. Use a tension tester to measure the tension on different strings. This will ensure that the tension is consistent throughout the racket.
If any adjustments are needed, they can be made using the stringing machine until the desired tension is achieved.
Maintenance of a Racket Stringing Machine
This isn’t quite a part of how to use a racket stringing machine to string your rackets but from a holistic perspective, it’s important to take care of your machine like you would do with your rackets.
We have a step by step guide on the maintenance and repair of a racket stringing machine here which should help you get an idea about what can be done about this.